Instagram Facebook Youtube Twitch X
Share this
Visit website

Join our mailing list for crowdfunding updates

Your Bedroom Recordings Are Release-Ready: Stop Waiting for a Big Studio 

Here's the lie a lot of bedroom producers tell themselves: "My music would be good if I had a real studio."

No. Your music would be good if your recordings were clean, your takes were committed, and you stopped using the room as an excuse. Plenty of records that went platinum were tracked in bedrooms, closets, and tour buses. The gear gap between a home setup and a pro vocal chain matters way less than most people think — and the actual gap is closer than it's ever been.

What holds most home recordings back isn't the bedroom. It's four fixable things: the wrong mic for an untreated room, sloppy gain staging, skipping the cheap room fixes, and quitting on takes too early. Let's go through them.


Use the right mic for the room you have

The classic beginner move is buying a big condenser mic, putting it in the middle of a bare bedroom, and wondering why the vocal sounds like it was recorded in a bathroom. The fix isn’t a cheaper mic — it’s a smarter one. A modeling mic like the Universal Audio Sphere LX puts a whole locker of classic mic sounds in a single body, so you can match the mic to your voice instead of settling for one flavor. And since it captures both capsules, you can adjust pattern and tone after the take.

Pair it with the interface it was built for — the Apollo Twin X Duo Gen 2 runs the Sphere mic modeling in real time through UA's Console software, with Unison preamps that behave like the analog gear they're modeled on.


Mic close — 3 to 6 inches. The closer you are, the more your voice dominates the mic’s pickup and the less the room matters. That one habit buys you more "pro sound" than any piece of gear.

Set your gain like an engineer, not a gamer

Clipping is forever. You can't un-clip a take in the mix — and a hot interface is the number one killer of home recordings.

Aim for your loudest peaks to land around -12 to -6 dBFS on the way in. That leaves headroom for the moments you go harder than you expected, and it keeps you in the sweet spot of the preamp instead of slamming it. Sing or rap your actual performance — not a quiet practice take — when you set levels, because you will always perform louder than you rehearse.

And record at 24-bit. At 24-bit you've got so much dynamic range that tracking conservatively costs you nothing. Noise floor is not your problem; clipping is.

Do the cheap room fixes anyway

You don't need treatment panels to kill the worst of the room sound. You need to break up the reflections closest to the mic.

The free version: record facing into an open closet full of clothes. Clothes are broadband absorption — ugly, free, and effective. No closet? Hang a heavy moving blanket behind you and another behind the mic. Pack the corners with pillows if you're feeling ambitious.

The $100 version: a few packs of rigid fiberglass or rockwool panels from the hardware store, wrapped in fabric, hung at the first reflection points around your recording spot. That's it. You don't need a treated room. You need a dead zone about six feet wide where the mic lives.

Commit to the performance

This is the part nobody wants to hear: the difference between a bedroom demo and a bedroom record is almost always the take.

Big studios don't make performances better — they make it harder to lie to yourself, because there's an engineer and a clock watching. At home, nobody stops you from keeping take three and calling it good. Don't. Do takes until the performance feels right, not until you're tired of doing takes. Comp the best lines together. Punch in on the lines that are weak.

A committed, emotional take through a $100 mic will beat a bored take through a $3,000 mic every single time. Every time.


Mix with references, not hope

Once the takes are solid, the mix is where bedroom records actually die — usually in the low mids. Solo your vocal against a reference track from an artist you respect. Match the tone roughly before you reach for anything fancy. High-pass what doesn't need to be there. Cut the mud before you boost the shine.

And check the mix on headphones you trust. The Audio-Technica ATH-M50x is the modern studio standard for a reason — flat enough to trust, cheap enough to own. If it sounds right on the M50x and your car stereo, it's translating.


You don't need permission from a big studio to make a real record. You need a decent mic close to your mouth, clean gain, a dead corner of your room, and the discipline to keep doing takes until they're right.

And if the mix is where you're stuck? That's literally what I do. Bring me your stems — recorded in your bedroom, your closet, wherever — and I'll make them hit. Mixing and mastering at mixedbysilent.com.
10/15/2026

  • Leave a comment
  • Share
    Your Bedroom Recordings Are Release-Ready: Stop Waiting for a Big Studio

    Share link

in Mixing Clinic

Building a Studio Subwoofer Box That Actually Hits 

A good sub in the studio isn't about rattling windows. It's about hearing what your low end is actually doing — where the kick stops and the 808 starts, whether the bass is in tune, and what your mix will do on a club system or a car trunk. A lot of “studio sub” setups fail because the box is an afterthought: whatever enclosure the driver came in, shoved in a corner.

I've built enough MDF boxes — for studios, for cars, for arcade cabs — to tell you straight: the box matters as much as the driver. Maybe more.

And look — if DIY isn't your thing, there's nothing wrong with a finished box. Something like the Samson Auro D1200 gives you a 12-inch driver and 700 watts in a box somebody else already braced. But building it yourself costs half as much, teaches you exactly how your low end works, and lets you tune the box to your room instead of a showroom.

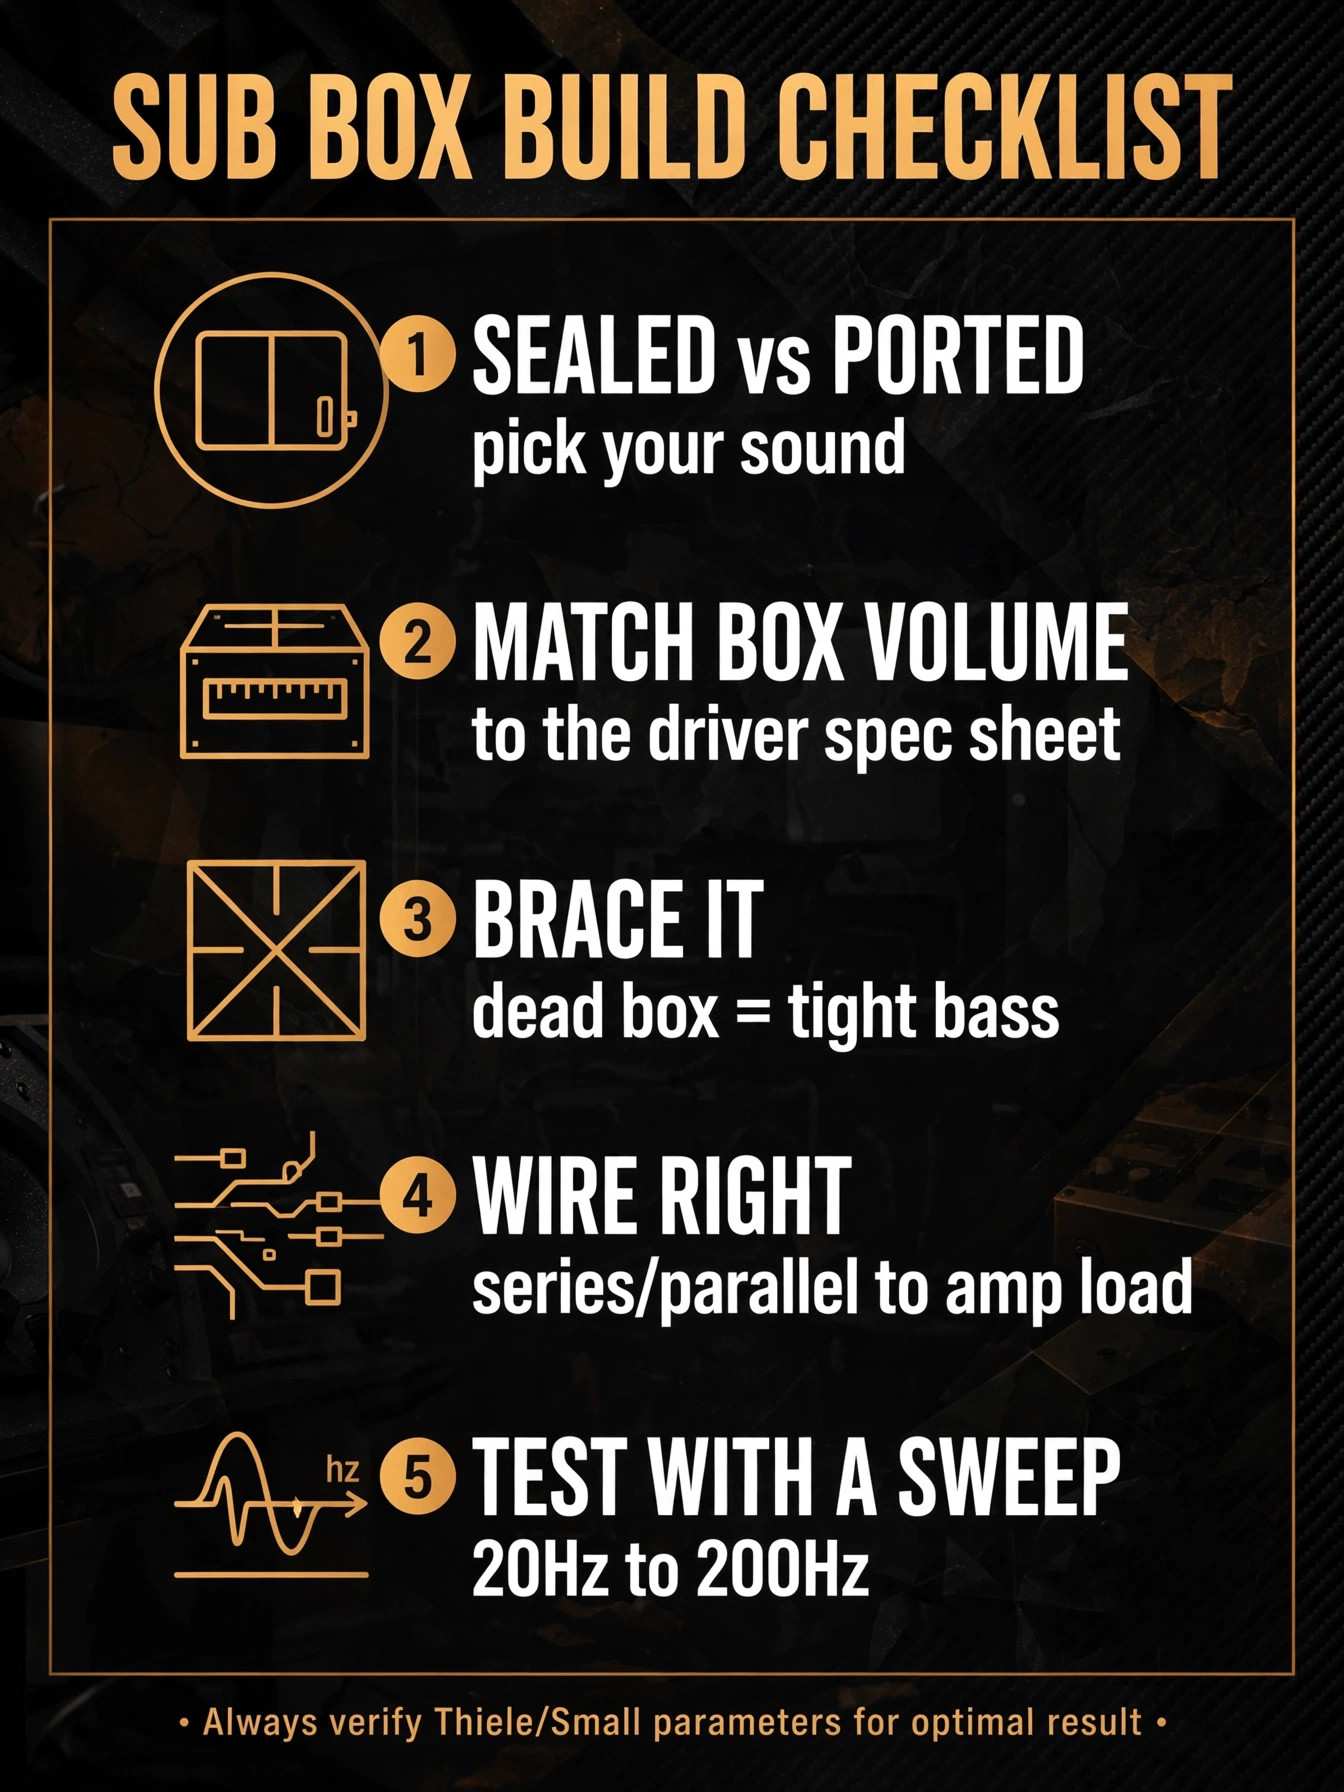
Sealed vs. ported: pick your sound

A sealed box is airtight. Smaller, more forgiving, and it rolls off smoothly at the bottom. It gives you tight, accurate bass with great transient response — when the kick hits, it hits and gets out of the way. For a studio, this is usually the right call. You want to hear the truth, not a hyped one-note thump.

A ported box adds a vent (a tube or slot tuned to a specific frequency). It plays louder and deeper around that tuning frequency, but the trade-off is real: more group delay, and below the tuning frequency the driver is basically flapping in free air — it can unload and damage itself if you feed it subsonic content. Ported boxes are bigger too, because the port itself eats internal volume.

If you're monitoring mixes, go sealed first. You'll thank yourself when your 808s translate.

Match the box to the driver, not the other way around

Every reputable driver ships with Thiele/Small parameters — Vas (equivalent air volume), Fs (resonant frequency), Qts (total Q). These numbers aren't decoration. They tell you the exact internal air volume the box needs, sealed or ported.

The math is simple: internal volume = (H × W × D) of the inside of the box, minus whatever the driver, bracing, and port displace. Measure in inches, divide by 1728 to get cubic feet. Then compare to the driver's spec sheet. Most 10" and 12" drivers want somewhere between 0.8 and 1.5 cubic feet sealed. If your box is way too small, the bass gets thin and peaky. Way too big, and it gets sloppy with no punch.

Do the math before you cut a single board. An afternoon with a calculator beats a weekend rebuilding a box that sounds wrong.

Brace it like you mean it

A box that flexes is a box that lies. Every panel that vibrates is energy that should have gone out of the driver — it smears your bass and adds resonances that aren't in your mix.

Use 3/4" MDF, not particle board, not thin plywood. Glue and screw every joint (wood glue plus coarse-thread screws), and add internal bracing: window braces or dowel braces tying opposite panels together. The goal is a dead box — knock on it and you should hear a dull thud, not a drum. Seal the inside joints with silicone caulk so there's no air leak. A leaky “sealed” box is just a badly tuned ported box.

Wire it right

If your driver is dual voice coil, know your amp's load before you wire. Two 4-ohm coils in series = 8 ohms. In parallel = 2 ohms. Run a 2-ohm load into an amp that only handles 4 and you'll cook it — or at least trip protection every time a big low note hits. Match the wiring to what your amp is rated for, and use real speaker wire (16 gauge minimum for short runs, 12 if you're running distance). Crimp or solder your terminals; a loose connection at 200 watts is a fire risk, not just a sound problem.

Place it, then test it with a sweep

Corner placement gives you free output (up to 12 dB from boundary reinforcement) but also the worst room modes. Start with the sub near your listening position — the classic “sub crawl”: put the sub where your head sits, play a bass-heavy track, then walk around the room and find where the bass sounds most even. That's where the sub goes.

Then verify with a sine sweep, 20 Hz to 200 Hz. Listen for dips, peaks, rattles, and port noise. What you're after is a smooth response with no holes — that's what lets you make mix decisions you can trust on other systems.

Infographic: building a studio subwoofer box that hits

Your mixes are only as good as what you can hear. If your low end needs a second set of ears, that's what I do — mixing and mastering at mixedbysilent.com. Bring me your stems and let's make the bass translate everywhere.

10/07/2026

  • Leave a comment
  • Share
    Building a Studio Subwoofer Box That Actually Hits

    Share link

in Studio Builds

Kevin Huckaby Unleashes a Wild New Tale — Independent Release from What The Huck Presents 

Supa K is back on the mic — writing under his alias Kevin Huckaby — and this time, he's telling a story you won't forget.

This independent release, presented by What The Huck Presents, follows that fella through an ongoing tale that's equal parts wild and entertaining. It's the kind of story that keeps you locked in from the opening line — part cinema, part campfire, all Huckaby.

New episodes drop weekly — and this one's a short run, so tap in now before it's over. I'm grateful to be a part of this project, and honored to be starring in it. 👀

The episode is out now on YouTube.

Watch now on YouTube: https://youtu.be/2QK6abW8p2k?is=gd4FUNjCPK1a1-uJ 

More from What The Huck Presents: https://www.youtube.com/@WhatTheHuckPresents 

Run it up. Share it with somebody who loves a good story.

10/02/2026

  • Leave a comment
  • Share
    Kevin Huckaby Unleashes a Wild New Tale — Independent Release from What The Huck Presents

    Share link

Dialing In Engine Audio for Sim Racing: What to Listen For 

Your eyes watch the track. Your hands feel the wheel. But your ears? They might be your cheapest telemetry system — if you set the audio up right.

Most sim racers spend hours on force feedback settings and never touch the audio mixer. That's backwards. Engine sound, tire scrub, opponent position, curb hits — the game is feeding you information through your speakers the whole lap. Here's how to make sure you're actually hearing it.

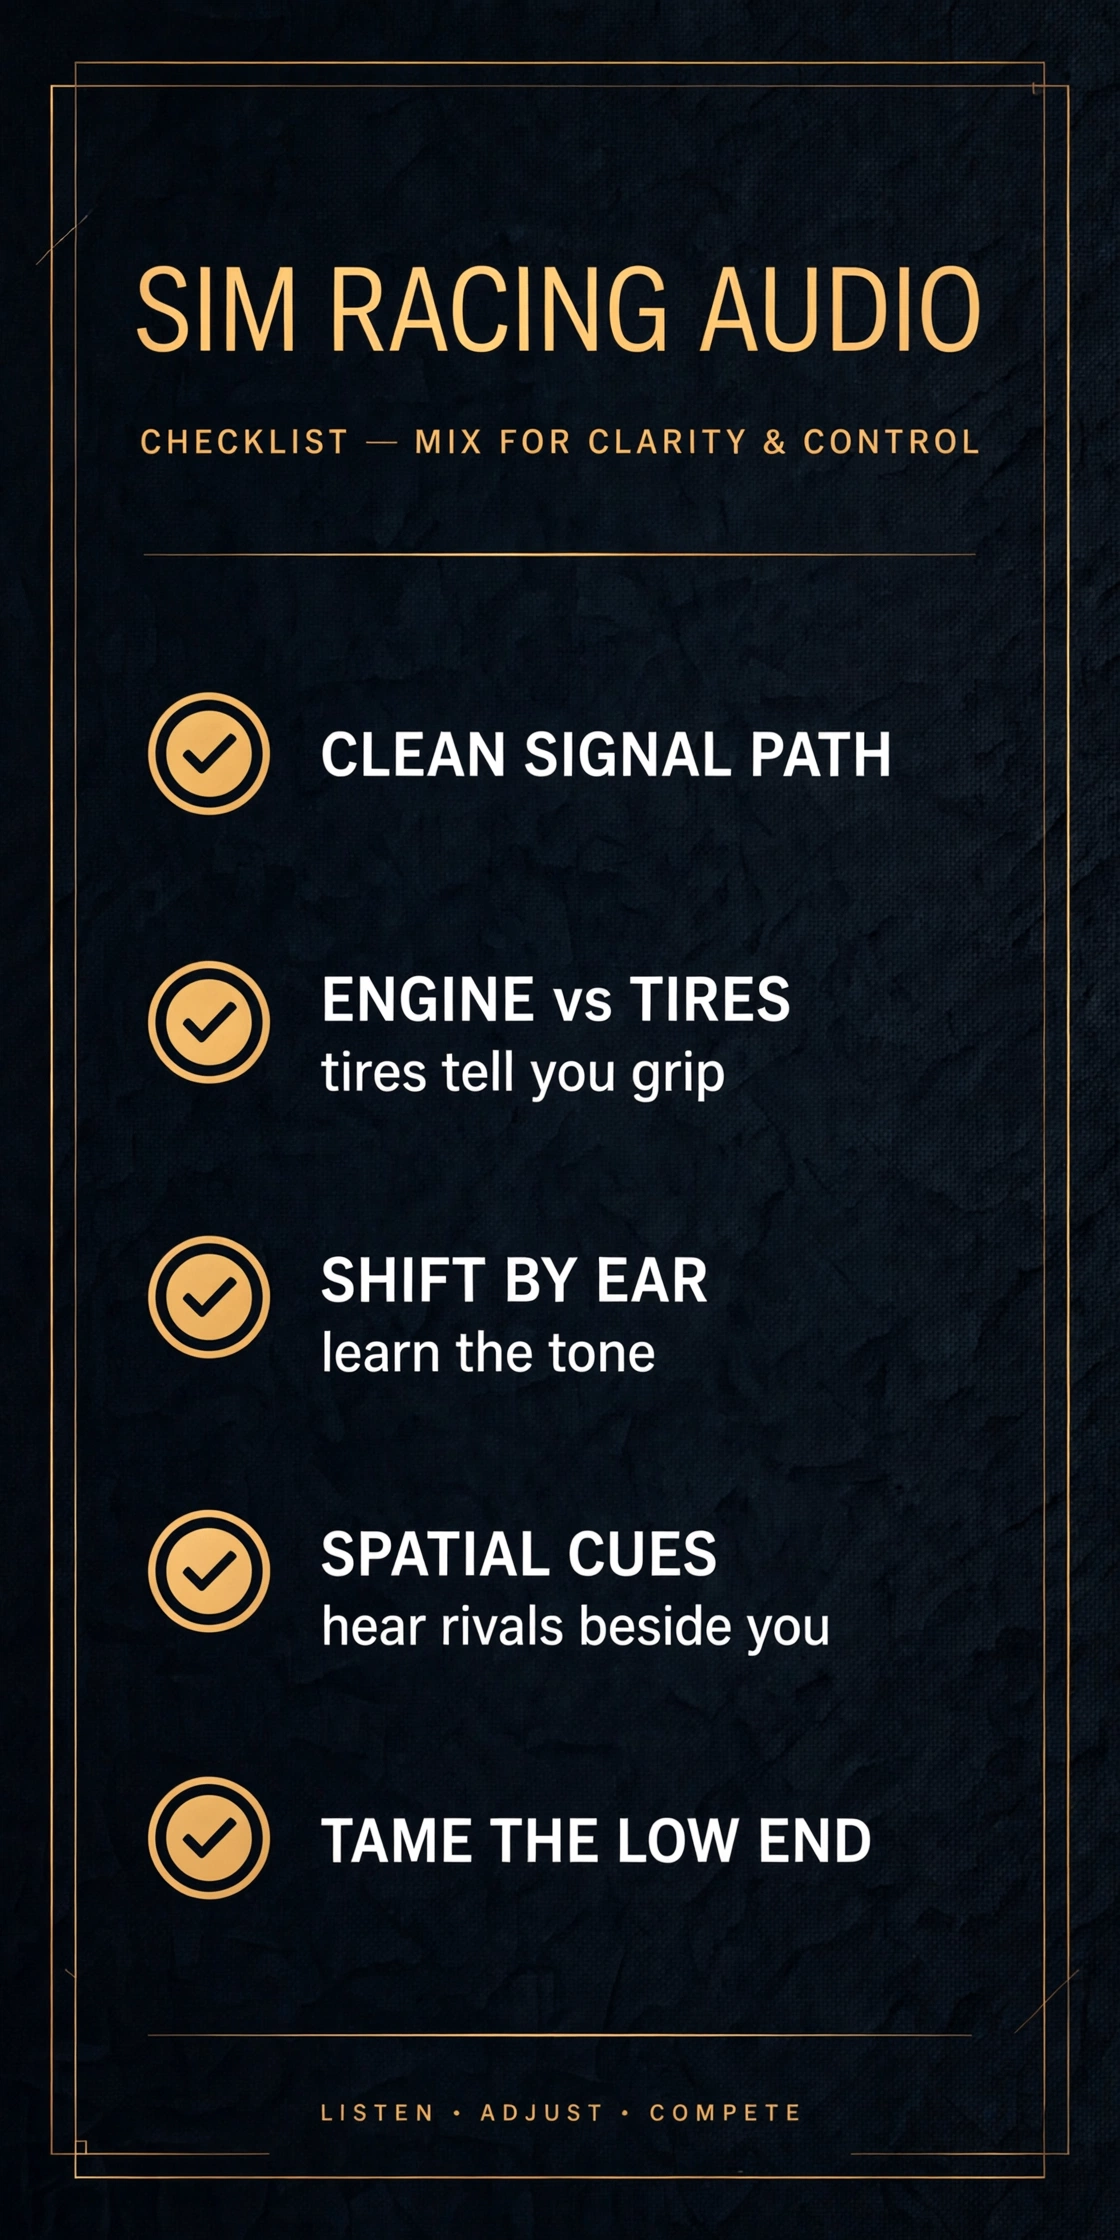
Start with a clean signal path

Garbage in, garbage out — same as a mix. If you're running audio off a motherboard jack into whatever headphones were cheapest, you're smearing the details you need. A solid USB interface like the MOTU M2 gives you a cleaner DAC and a real headphone amp, which means tighter bass and clearer mids. You don't need studio-grade gear, but you do need a signal path that isn't lying to you.

One rule: set your system volume high and the in-game master moderate. Digital clipping in the game bus sounds like grit on the engine note — if your exhaust crackles in a way the car doesn't actually do, that's not character, that's your levels.

Engine vs. tires: the mix that matters

In every sim worth playing, there are two channels competing for your attention: the engine and the tires. Here's the thing most people get wrong — they crank the engine because it sounds cool, and then they can't hear tire scrub anymore.

Tire scrub is data. It tells you when you're at the edge of grip, when you're understeering wide, when the rears are starting to step out. The engine is the carrier; the tires are the message. Drop the engine volume until the tire noise sits clearly on top through corners, then stop. It'll feel quiet at first. Give it ten laps and you'll wonder how you ever drove deaf.

Learn to shift by ear

Every car has a tone where it stops pulling. Revs climb, the pitch rises — and then the note goes flat and harsh at the top end. That's your shift point, and it's faster than watching a tach bar or waiting for a shift light. The problem is that most people never learn the tone because their engine audio is drowned in bass or buried under the spotter.

Do this: pick one car, one track. Run ten laps with the spotter off and your eyes on the road, not the HUD. You'll start hearing the power band. Once it's in your ears, you stop thinking about shifting entirely — which frees up your brain for the actual racing.

Spatial cues: hear the car next to you

Battles are won and lost on knowing exactly where the other car is. Open-back headphones are a real advantage here — the wider soundstage makes it much easier to place a car on your left-rear quarter versus dead beside you. The Beyerdynamic DT 990 PRO is a studio staple for a reason: the stereo image is honest, and that honesty translates directly to knowing where your rival is without looking.

If you race in VR, this matters even more. With the world wrapped around your head, your brain expects sound to behave like real space. Check your sim's audio settings for HRTF or headphone surround options and actually test them — the default is rarely the best one.

Tame the low end

The exhaust note and curb rumble live in the low end, and this is where most rigs fall apart. Too much bass and every curb hit turns into mud; the rumble masks the midrange detail where tire and opponent cues live.

If you run a bass shaker or tactile transducer, treat it like a subwoofer in a mix: it should add feel, not wash. Turn it up until you feel curb strikes distinctly, then back off a hair. If your whole rig is buzzing constantly, you've got too much low end — dial the game's bass-heavy effects down and let the shaker carry the weight instead. Separation is the whole game: ears handle detail, the rig handles impact.

The test routine

Don't change everything at once. Here's the process:

  1. Reset the in-game audio to default, spotter off.
  2. Set engine volume so tires are clearly audible in corners.
  3. Run five laps in one car and note where the shift tone sits.
  4. Add opponent audio and confirm you can place cars by ear.
  5. Dial low-end effects until curbs feel distinct, not muddy.

One car, one track, one change at a time. Same as dialing in a mix — you don't EQ everything at once and hope.

Your ears are free lap time

Nobody's audio setup is perfect out of the box. But an hour spent tuning what you hear will do more for your consistency than an hour spent tuning your force feedback curve — because audio is information, and information is lap time.

Speaking of audio — it's literally what I do for a living. If you're a producer who needs mixes that translate or masters that hit hard on every system, check out my mixing and mastering services at mixedbysilent.com. Same ears, different track.

10/02/2026

  • Leave a comment
  • Share
    Dialing In Engine Audio for Sim Racing: What to Listen For

    Share link

in Sim Audio

5 Vocal Chain Moves for Rap Vocals That Actually Cut Through 

If your rap vocal is getting buried under the beat, the fix is almost never "turn it up." It’s the chain. Here are five moves I use on every rap mix — in this order — to get vocals that sit on top and stay there.

1. Clean up before you add anything

Before a single compressor or EQ boost touches the vocal, take out what’s fighting it. High-pass around 80–100 Hz to kill rumble and handling noise. Then sweep a narrow notch through 200–400 Hz and pull 2–3 dB where the boxiness lives. Don’t guess — find the frequency that makes the vocal sound smaller and cut it. A vocal that starts clean needs way less work downstream, and every plugin after this one behaves better.

2. Two compressors instead of one

One compressor doing 10 dB of gain reduction on a rap vocal will pump and sound crushed. Split the job across two stages. First, a fast compressor — attack around 1–10 ms, quick release — grabbing the peaks, maybe 3–4 dB on the loud parts. Then a slower, gentler compressor — attack 20–30 ms, release set to breathe with the performance — evening out the overall level, another 3–4 dB. Same total control, half the artifacts, and the vocal stays up front without flattening the delivery. If the rapper’s flow has wild dynamic swings between bars, automate a little clip gain first. Compression shouldn’t do your riding for you.

3. Air without harshness: boost smart in the highs

Rap vocals need presence, but there’s a difference between present and painful. Instead of one wide boost at 8 kHz, try this: a small dip around 2.5–4 kHz where sibilance and nasally harshness pile up, then a high shelf boost up at 10–12 kHz for the air on top. That shelf adds sheen without shoving the consonants in the listener’s face. If the vocal gets spitty on S and T sounds, don’t cut more highs — reach for a de-esser around 5–8 kHz first and tame the source of the problem.

4. Saturate in parallel, not on the insert

A little saturation on a rap vocal adds the harmonic grit that makes it cut through a dense 808 and hi-hat bed. But printing saturation straight on the insert can get harsh fast. Run it in parallel: send the vocal to a bus, hit it with a tape or tube saturator until it’s clearly crunchy, then blend that bus back in underneath the dry vocal at 10–20%. You get all the edge and forwardness with none of the harshness taking over. This is the same reason I parallel-compress drums — control without compromise.

5. Sidechain the beat’s mask, don’t EQ the vocal thinner

When the vocal and the beat are fighting in the same midrange, the lazy fix is carving chunks out of the vocal — and that’s how you end up with a thin vocal that still doesn’t cut. Instead, duck the things masking the vocal. A 1–2 dB sidechain dip on the melody bus or the 808’s upper harmonics, keyed from the vocal, opens a pocket for the voice only when it’s actually there. The beat stays full, the vocal sits on top, and neither one loses its weight. Static EQ is for balance problems. This is a movement problem, so use movement.

The bottom line

Most buried rap vocals aren’t too quiet — they’re competing. Clean the lows, control dynamics in two stages, shape the highs with a de-esser and a shelf, add grit in parallel, and let the beat move out of the way when the voice speaks. Five moves, in order, and the vocal will cut through on earbuds, car stereos, and club systems alike.


If your vocals still aren’t sitting right and you’ve spent enough hours fighting them, that’s what I’m here for. I mix and master records every day at mixedbysilent.com — send me your stems and I’ll get the vocal cutting through so you can focus on making the next one.

09/25/2026

  • Leave a comment
  • Share
    5 Vocal Chain Moves for Rap Vocals That Actually Cut Through

    Share link

in Mixing Clinic

New Release!!! D.R.U.M.S. Rugged-Rugged City 

Golden Era Hop Hip lives! Allow me to introduce, DFW's own, D.R.U.M.S. Rugged and Supa K on the beat. I really looking forward to more from him. Classic hip hop is always a great palette cleanser to what's popular right  now, for me. And this is no exception.


02/06/2022

  • Leave a comment
  • Share
    New Release!!! D.R.U.M.S. Rugged-Rugged City

    Share link

in New Release!

New Release!!! -ThaKraken ft. Coolassppl and Reloris 

More good music!! Check out the Alien Invasion video!!!

Available on Itunes

12/05/2021

  • Leave a comment
  • Share
    New Release!!! -ThaKraken ft. Coolassppl and Reloris

    Share link

in New Release!

New Release!!! Stezo-The Last Dance 

I have been fortunate enough to work on this project. It was a bitter sweet experience to work with and for someone who held a special place in my love of Hip Hop. Great thanks for Chris Lowe for giving me the opportunity! R.I.P. Stezo.....Available at on vinyl,CD, and digital at:

https://www.fatbeats.com/products/copy-of-stezo-the-last-dance-2xlp-red-vinyl-fat-beats-exclusive

12/05/2021

  • Leave a comment
  • Share
    New Release!!! Stezo-The Last Dance

    Share link

in New Release!